
Building Flows
Flows in Pucho are made up of two key parts — Triggers and Actions.
A flow begins with something happening (the trigger) and continues with a set of responses (the actions). Together, they help you automate repetitive work or connect multiple apps seamlessly.
Trigger
A trigger defines when a flow starts.
It could be a new form submission, a message received, a file uploaded, or any custom event inside your workspace.
Pucho supports multiple types of triggers — such as Schedule Triggers, Webhook Triggers, or Event-Based Triggers linked to integrated services like Gmail, ClickUp, or Google Sheets.
Example
- When a new lead is added to Google Sheets
- When a new order is received via webhook
- Every morning at 9 AM
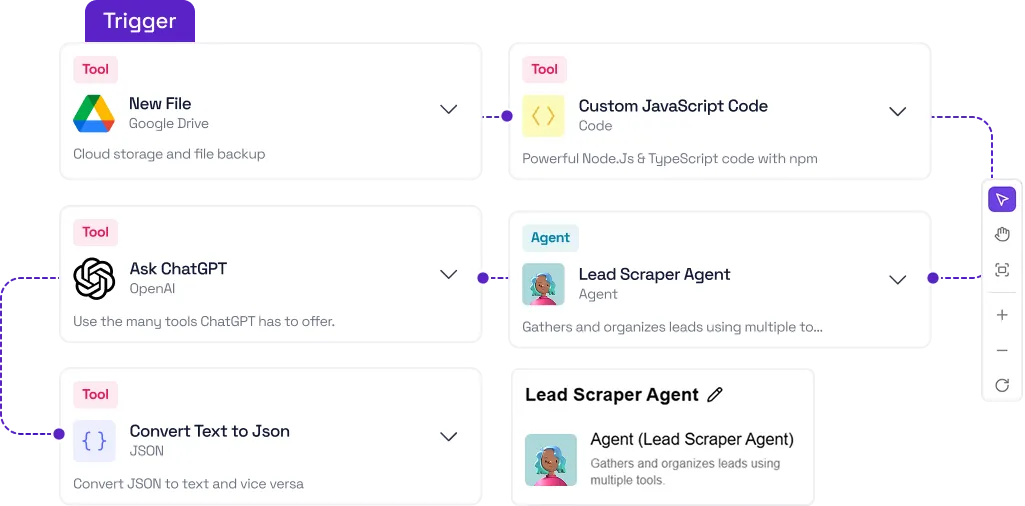
Action
Actions define what happens next after a trigger fires.
They can perform tasks like sending an email, updating a record, parsing data, or even calling another agent to make a decision.
You can chain multiple actions together — building powerful end-to-end automations that connect multiple systems with intelligence.
Example
- Trigger → New form submission
- Action 1 → Extract key data from the form
- Action 2 → Send confirmation email to the user
- Action 3 → Notify your team on Slack
(Use a similar visual as the Activepieces example: Trigger → Action → Action)

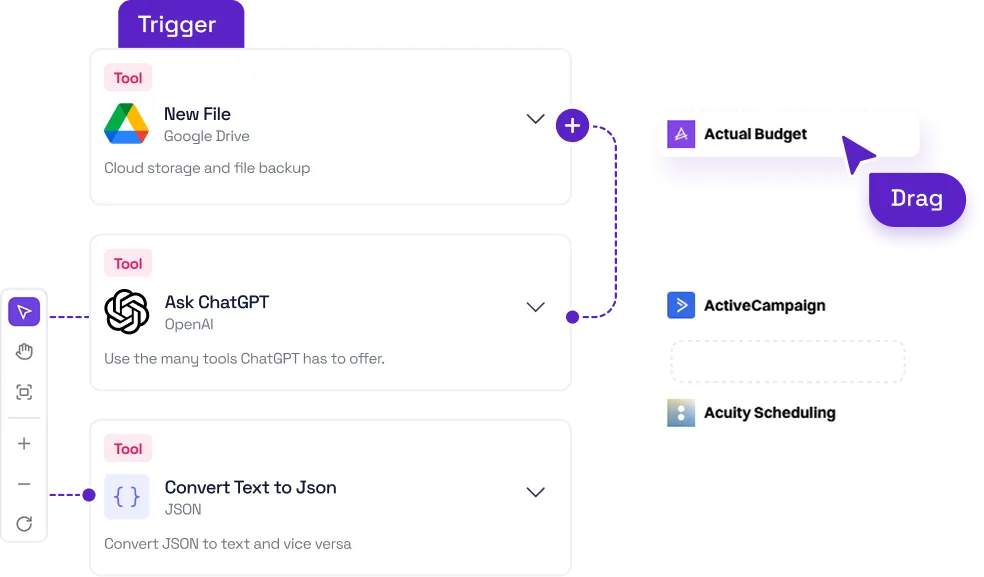
Passing Data
Using outputs from earlier steps in your current step
Data Flow
Action steps.
Data flows downward: every step passes its results to the next one.
Child steps automatically have access to all output data from their parent steps.
Example
If your flow has four steps, data moves like this:
- Step 1 – Trigger (Every X Minutes):
The scheduled trigger initiates the flow at a fixed interval.It doesn’t produce new data but starts the process automatically. - Step 2 – Ask PuchoAI:
This step uses PuchoAI to analyze or generate insights based on predefined logic. Its output can be used in Step 3 and Step 4. - Step 3 – Ask ChatGPT:
This step reads data from Step 2, processes it further (for example, rewriting, summarizing, or generating text),and produces refined content for the next step. - Step 4 – Send Email (Gmail):
The final step sends an email using the output from Step 3 (and optionally Step 2). Since it’s the last step, its output isn’t passed further.
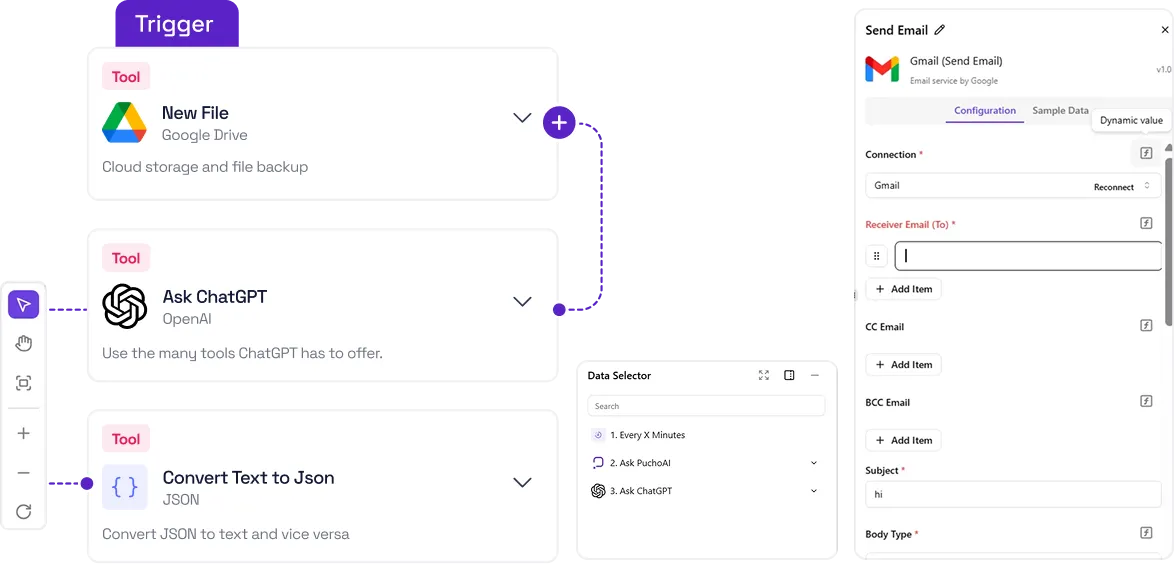
Data to Insert Panel
When you’re configuring an action and want to use results from a previous step, place your cursor in any input field.
Pucho will automatically open the Data to Insert panel.
This panel lists all prior steps and their available data.
You can expand each item to explore its properties or click to insert it into your current input.
If an entry has a small caret (▾) next to it, you can expand it to reveal nested fields.
You can insert the whole object or just a specific property.
When inserted, the data placeholder appears exactly where your cursor is — allowing you to mix static text with dynamic fields in any input box.
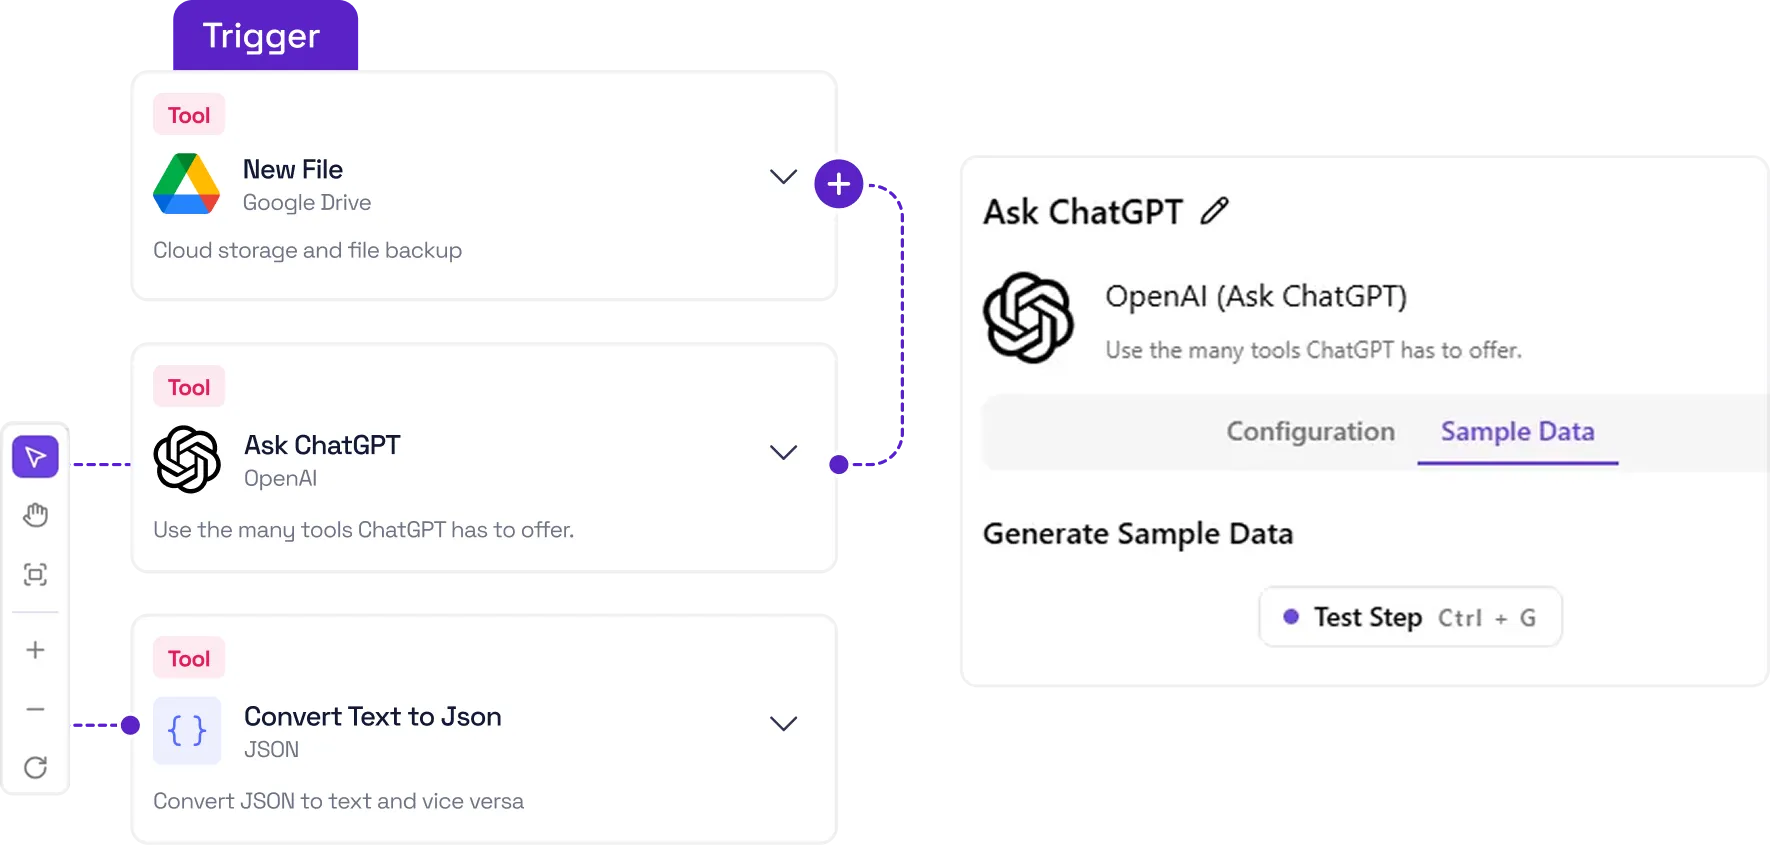
Testing Steps to Generate Data
Before you can access a step’s data, you’ll need to test that step.
Testing ensures Pucho generates sample data, helping you preview field names and verify structure before the flow runs live.
If you attempt to use untested data, you’ll see this reminder:
If you attempt to use untested data, you’ll see this reminder:
To resolve it, open the step and use the Generate Sample Data option.
Different step types handle testing differently
- Load Data: Retrieves sample data directly from your connected account.
- Test Trigger: Fires the actual trigger event to collect example data.
- Send Data: Sends a test request to your webhook URL to fetch data.
- Test Action: Executes the configured action once to generate data.
Follow the on-screen instructions within the Generate Sample Data panel to complete the process.
Some pieces also offer a Use Mock Data option, but we recommend testing with real samples whenever possible.
Advanced Tips
Switching to Dynamic Values
Certain dropdowns or select fields don’t allow direct dynamic data.
If you’d like to use values from previous steps, switch that field into dynamic input mode using the toggle next to it.
Once enabled, you can insert data just like any other field.
You can expand each item to explore its properties or click to insert it into your current input.
If an entry has a small caret (▾) next to it, you can expand it to reveal nested fields.
You can insert the whole object or just a specific property.
When inserted, the data placeholder appears exactly where your cursor is — allowing you to mix static text with dynamic fields in any input box.
Accessing Data by Path
If the value you want isn’t visible in the Data to Insert panel, you can reference it manually using JSON path syntax.
{{step_slug.path.to.property}}
Here’s how it works:
Here’s how it works:
→ The unique ID of the step (visible when you hover over it).
path.to.property
→ The nested path of the field you want to access.
Example:
{{extract_customer.data.email}}
Publishing Flows
Make your flow live by publishing your updates
When you make changes to a flow in Pucho, those updates stay in draft mode until you publish them.
Once your edits are finalized and tested, simply click the Publish button to activate the latest version of your flow.
(Insert image of the “Publish” button, similar to your screenshot)
Tip: You can safely modify or test a draft without affecting the currently active flow. Only published changes go live.

Debugging Runs
Ensuring your automations are running smoothly
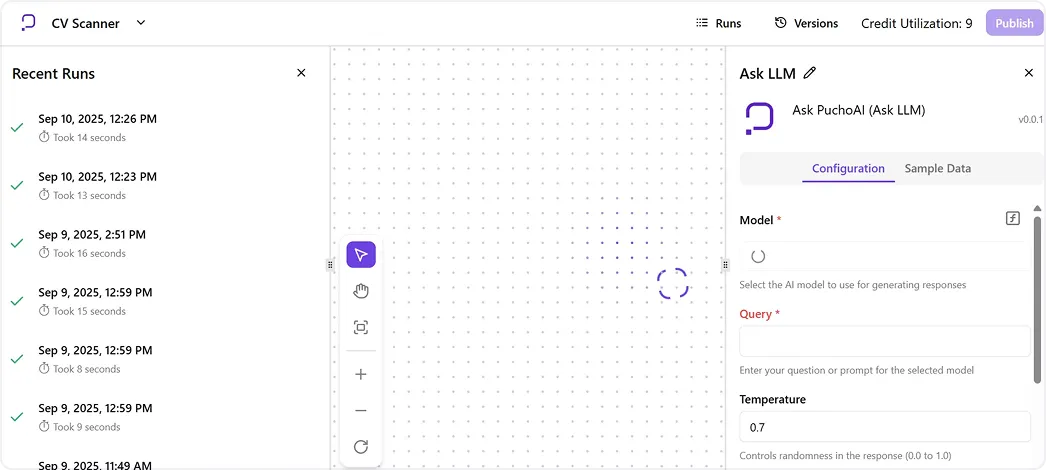
You can monitor every execution of your flow directly from the Runs section in Pucho.
Each run represents one complete instance of your automation, allowing you to review its progress, outputs, and any issues step by step.
How to Debug a Run
- When a new lead is added to Google Sheets
- Locate the run you want to inspect and click to open it.
- You’ll see your flow displayed in a view-only mode, with each step marked by a ✅ (successful) or ❌ (failed) indicator.
- Click on any step to open the Run Details panel — this shows the input and output data for that step.
The Debugging Experience
You’ll be able to
- See how data moves between steps.
- Identify which step failed or returned unexpected results.
- Review logs for deeper insight.
- Validate API calls, responses, or parsed data before publishing new changes.
Tip
Use debugging regularly after editing or testing flows to ensure your automation logic works as expected before moving it into production.
Version History
Track and manage different versions of your flows in Pucho
Pucho automatically keeps track of every flow you publish — including its versions, timestamps, and changes — so you can always revisit or restore previous setups.
Here’s how versioning works in Pucho
- You can edit a flow as many times as you want in draft mode.
- Once you’re satisfied with your updates, click Publish to make your latest version live.
- The published flow becomes immutable — meaning it can’t be edited directly.
- If you try to modify a published flow, Pucho will automatically create a new draft, copying the current live version so you can edit it safely.
This means you can always go back to any earlier version, make edits, and re-publish without affecting your active production flow.
Version history ensures you have a reliable audit trail and full rollback control.

Version Indicators
- Yellow dot → Represents a draft version (editable)
- Green dot → Represents a published version (live)
These indicators help you instantly recognize which version is currently active and which one is still being edited.
Tip
Use versioning to test updates, run A/B comparisons, or roll back to stable builds whenever something breaks after a change.
Technical Limits
System limits for Pucho flow execution
Flow Execution Time
Flow Execution Time
- Maximum: 600 seconds (10 minutes)
Flows running beyond this duration will automatically time out.
Memory Usage
- Maximum: 1 GB RAM
(Self-hosted users can adjust this limit using the environment variable PUCHO_MEMORY_LIMIT. )
Note: Memory usage reflects the entire process executing the flow.
There’s roughly a 300 MB baseline overhead for a warm process with connectors already loaded.
Note 1: Flows paused by steps like Wait for Approval or Delay don’t count toward the 600-second execution limit.
Note 2: For longer workflows, consider splitting them into multiple flows.
Examples:
- Trigger one flow from another via Webhook.
- Process smaller batches of items using separate flows.
Flow Execution Time
Files from triggers or actions are stored temporarily in secure storage to ensure retries and consistency.
- Maximum File Size: 10 MB
(Configurable via PUCHO_MAX_FILE_SIZE_MB, default: 4 MB)
Key / Value Storage Limits
Some components in Pucho — such as Store Data or Queue Data steps — rely on internal key-value storage.
- Maximum Key Length: 128 characters
- Maximum Value Size: 512 KB